The HP P4XX
The HP P4XX series of RAID controllers are HP’s first PCIe SAS/SATA Raid controllers, and personally I have found them to work excellently for use in my servers (G5/G6 servers). The cards are upgradable to use a 512MB cache and also have a backup battery for the cache (to prevent data loss in power outage). This battery backup unit is my only issue with these raid controllers…
The backup battery units use 4 series NiMh cells to for the battery. These cells inevitably go bad (though credit where its due.. the cells in mine are nearly a decade old!).
A quite overview of the specs of the cards, as i feel they are still half decent value for money (Since i picked mine up for <$50 each)..
- 3G SAS and 1.5G SATA connections
- 512MB read/write cache (with backup battery)
- x8 Pci-e interface to the host (2 GB/seccond bandwidth)
- Online raid array expansion
- Online raid level migration
- Global spare drives
- Read ahead caching
- Write back caching
- NCQ support
The repair
The battery backup unit comes as a small module, consisting of a hard black plastic (ABS?) shell that holds the small circuit board for battery charging / protection and a cavity where the NiMh cells are mounted. The cells themselves are from Varta, and appear to be of quite high quality.

P400 Battery Pack
The cable for the battery unit terminates with a small pcb edge connector on the battery end, this cable can be carefully slid out of its slot and placed aside until the end. The small pcb is held in with a small clip, which can be easily poked to freedom. Huzzah! The designers used small spring contacts to provide the connection from the batteries through to the pcb, this makes everything easier. The pads are marked with a tiny + and - symbol to show the batteries polarity, but who needs those when there is a nice big sticker on the plastic indicating the positive terminal :).
I picked up a 4xAA (series connection) holder from the local Jaycar as well as 4x NiMh batteries. The wires were shortened to around 20mm and then soldered onto the pads on the battery controller pcb.
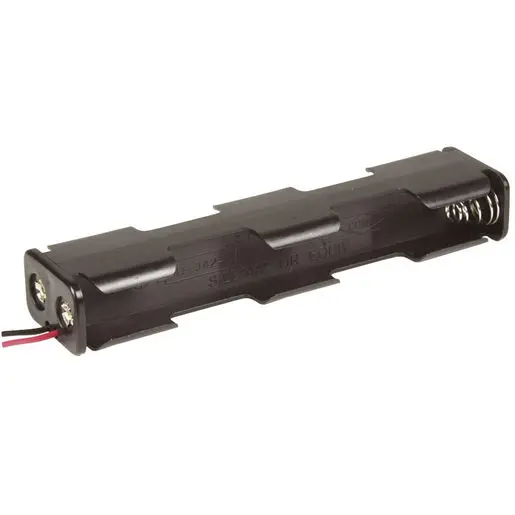
The 4 x AA battery holder
This was all the (really hard) wiring that was required.. Next was a matter of using some double sided tape to attach the pcb to the battery pack. Also note a small amount of double sided tape was also placed between the pcb and the cables connector - the old plastic case used to hold this connected on place, however now i am no longer using that unit some tape was added to hold the connector in place.
Thats it!!
No stuffing around, nice and easy… The batteries almost fit into the mouldings for the official battery units, close enough they do not obstruct the airflow. On the plus side the batteries are now also significantly larger in capacity which should help in runtime :)