H2O N2 - Water Cooling an Odroid N2
In mid-2018, I started to move all of my home server use and compute from an HP microserver G8 over to ARM-based SBC’s. This move was inspired initially as a power-saving exercise to save the idle power draw of the microserver (50-100W). The original setup consisted of an Odroid C1 running standard developer services and the microserver moving to just acting as a backup device that only powered on to handle backing up computers in the house.
In due time this setup was upgraded to use a Pine64 board to replace the microserver, with it being connected to a large external drive to handle backups. Removing the microserver finally reduced the power consumption down towards a minimum and also killed off all the fan noise.
In March 2019, Odroid announced the new N2 SBC. This provided both a speed and core count boost over the Pine64 board, as well as proper USB3.0. While keeping the high performing gigabit that the C1 was putting to use while serving hard drives as a pooled storage volume.
The N2 now works as the primary device in the network, handling multiple roles thanks to a collection of docker images. The rough list of jobs is below, but this is not exhaustive as I often forget what else I have set up on it.
- Basic Nginx static website host
- Media server
- NAS (file share host on NFS and Samba)
- Syncthing
- Pi-hole
- InfluxDB + Grafana stack
- Backup to B2 storage
- Compress + archive media from our phones (pushed by Syncthing)
- Compiler for the TS100 software when testing locally
- Media transcode server
None of these jobs are incredibly taxing on the N2 apart from media transcodes that can take quite some time.
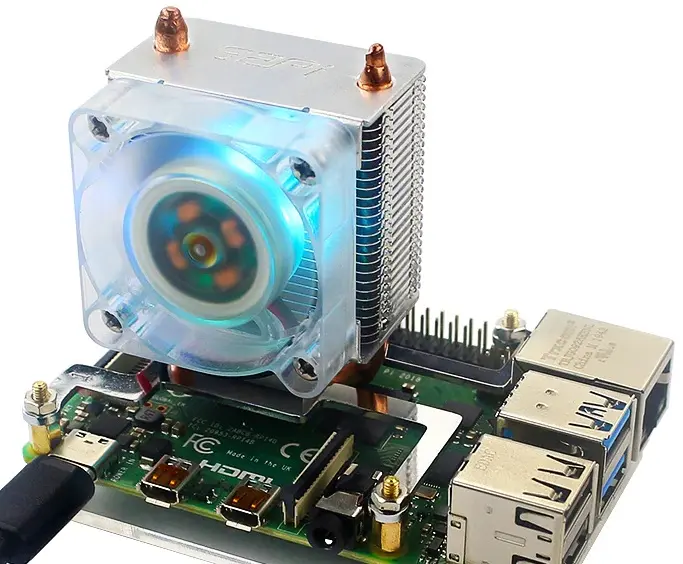
The only issues with this setup are that it is both large (external hard drives hanging off the N2) and it gets quite warm. Even with the unit “upside-down” with the heatsink side up, it can still get up to a toasty 70-80C on the CPU die under sustained load (12 hours of video processing). After noticing how hot the unit was running, making it the hottest running device in the room, the idea slowly started to form in the back of my head to cool the N2 better. Then, browsing Aliexpress for fun, I stumbled on the crazy Raspberry pi coolers. Rather than using one of these excessively large coolers with the noisy 40mm fans, why not go all out with water cooling.
The Concept
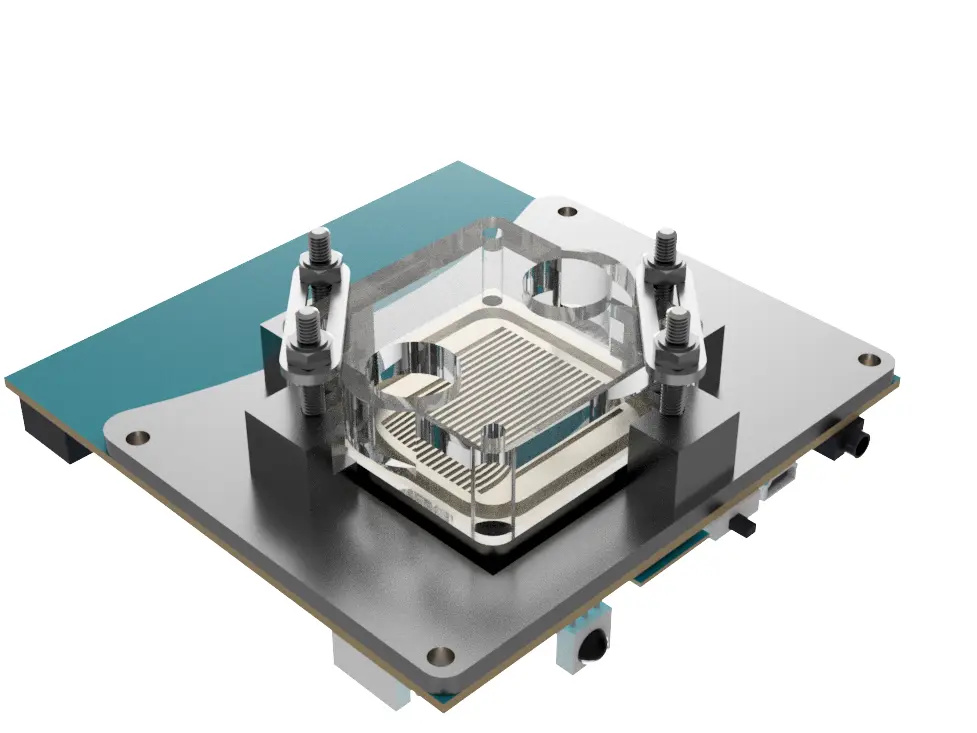
Born out of the idea to try water cooling the N2 to see how peak temperatures respond, the first steps were to evaluate if water cooling would help at all. Knowing that the top of the CPU is not direct contact, this could have high thermal resistance, and the die would still run hot.
A rather old H60 unit was kicking around in a parts bin after being donated from a friend after he updated his main machine a few years back. After a full flush and refill, it was performing relatively well on the desk, so a quick 3D printed adapter plate lined it up above the back of the main CPU on the N2. A small piece of aluminium offcut was used as a 2mm shim to prevent the cold plate shorting out on components nearby that are taller than the CPU + RAM packages.
Testing the AIO cooler, even with no fan on the radiator at all, dramatically lowered the temperature equilibrium point down to around 45-50C under CPU load with stress.
While this looked like a terrible setup, it proved that significant temperature improvements (30-40C) were easily achievable. Also, even passive cooling the large radiator of the H60 allowed for sufficient cooling of the N2, without the fan.
The water cooling
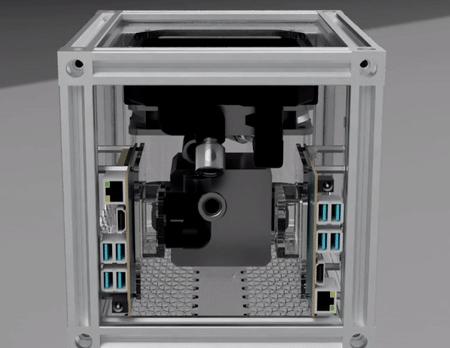
Designing for water cooling started by selecting a case, here I wanted to keep it to a small footprint, stackable and easy to modify. Stackablity is a feature mostly so that in the future, I could look into creating another matching unit to sit under the case to hold the hard drives required for the NAS function of the N2.
The case

Teaser
With the custom size of the N2 PCB, it would need an adapter plate to mount it into a standard PC case. However, while thinking about options for an enclosure, browsing Aliexpress turned up a reminder of 2020 T-slot extrusion as being an option. The main benefit is the ability to make a clean enclosure easily (assuming I don’t do the cutting), and standard sizes to design around. Using T-slot would mean less making mini-itx adapters and more time spent in CAD to lay out the components and check they fit. However, going with either option requires this CAD design time, as both have custom elements to the enclosure.
The cooling
To handle water cooling the N2 requires all of the essential components from a water cooling loop; a pump, reservoir, radiator and water block. As the processor is rated for around 6W power draw, any small water block should work in this design.
The parts used in the loop are entirely over the top for this simple load (6W). However, the plan is to build this loop to plan for future upgrades the main board to allow for better cooling down the line.
Water block selection
The water block selection is the most involved stage of the water cooling loop because of the relatively small size of the N2’s CPU and RAM area.
Looking on Aliexpress at pure copper or nickel-coated copper, there are not very many options at the small end of the scale. CPU water blocks tend to be the largest, followed by GPU blocks. There are a few companies making southbridge water blocks, which are small enough to work for this design. Southbridge bocks are also appropriately sized water block as typical southbridges are in the 5-15W range typically, which is perfect for the N2’s specifications.
The selected water block is nickel-coated copper rather than aluminium as this avoids mixing metals which creates corrosion issues. While this would require a slightly more expensive brass/copper radiator as well, not having anywhere near the problems with corrosion is worth the extra upfront cost. The cheaper aluminium blocks also often do not have any fins machined into them and so perform poorly at thermal transfer.
CPU water block
CPU Water Block
GPU water block
GPU Water Block
Southbridge water block
Southbridge Water Block
Radiator selection
The main selection criteria for the radiator was to keep cost low and to ensure it was copper-based. As the CPU in the N2 is low power compared to typical computing components, even a 120mm radiator should allow for the fan to turn off except during heavy workloads. For this design, I selected the cheapest 120mm copper radiator; however, almost any would work. The model used in the final design was the FREEZERMOD model as sourcing components from a few small stores on Aliexpress reduces the shipping costs.
Pump selection
Due to wanting to keep the case small, using a pump and reservoir combination would not fit, as even the tiny pumps with short reservoirs did not leave much clearance at the top of the case.
I selected a small generic pump from Aliexpress, making sure it has 4 wire control (PWM) so that it supports smooth control of the pump speed for noise. The particular pump I selected came with both a 4 pin fan connector and a Molex for the power. To keep the wiring neat, I spliced this into a fan extension instead. If I were to purchase these components again, I would select a pump that comes setup like this instead. As this pump draws less than 1A, there are no issues in using the fan connector for power.
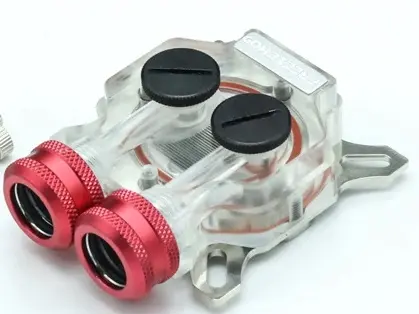
Resovoir selection
In regular operation of the N2 as a build server, the device is either idling or under 100% CPU load. Having a slightly larger reservoir than the minimal requirements adds more thermal mass into the loop to allow for the initial heat load of the processor to be absorbed into the water while the fan ramps up. This has the added benefit of short bursts of CPU being absorbed by the fluid without the fan turning on.
Dual tanks
Two smaller tanks are used in the place of a single larger tank to allow for greater space efficiency.
3D CAD - Checking the idea works
For the 3D cad design, Fusion360 was used to fit models of all of the components in free space to finalise a layout that would enclose everything neatly.
Design iteration one
Design iteration occurred at the same time as the initial parts selection. While browsing Aliexpress for cheap water cooling parts, searching on GrabCAD as well as google images for reference images or models. For this iteration, all models are approximate to check fit in the enclosure.
The design feature of the pair of symmetrical tanks at the front of the enclosure was decided. The case design allows for a second SBC on the side opposite the N2.
Using the symmetrical tanks requires more mounting and adapters, which adds cost to the build. This build could be built with only one tank (or none) to save on cost.

Version one
As shown above, the case material was selected to be 2020 T slot aluminium extrusion. 2020 is both cheap and available locally in case of shortages. Also, it feels fun to build with 2020 in the year 2020.
The current design calls for laser cut acrylic sheets for the side panels. The hexagon pattern is for fun and to see how much it will cost to laser cut. Hopefully, it turns out well when its sent off to be made.
The corner joiner pieces were selected so that the holes work as double duty for allowing stacking. By creating a peg to sit in the access hole, other units can be stacked below this unit and kept in rigid alignment.
After confirming all of the parts fit the design, their order was placed, and the waiting begins. For the order, I re-organised some of the part selection to swap out some of the connectors to alternative ones from FREEZERMOD so that I could bulk order the parts in one order. Ordering in bulk means the shipment is larger and more likely to arrive undamaged as well.
Iteration two
While waiting for all of the components to arrive, a second design iteration started. Focusing on alternate arrangements of the parts to provide a backup solution should sizes be slightly larger than intended. The Biggest unknown is the pump, as its size could cause issues with the water block on the N2, but it would hopefully clear.
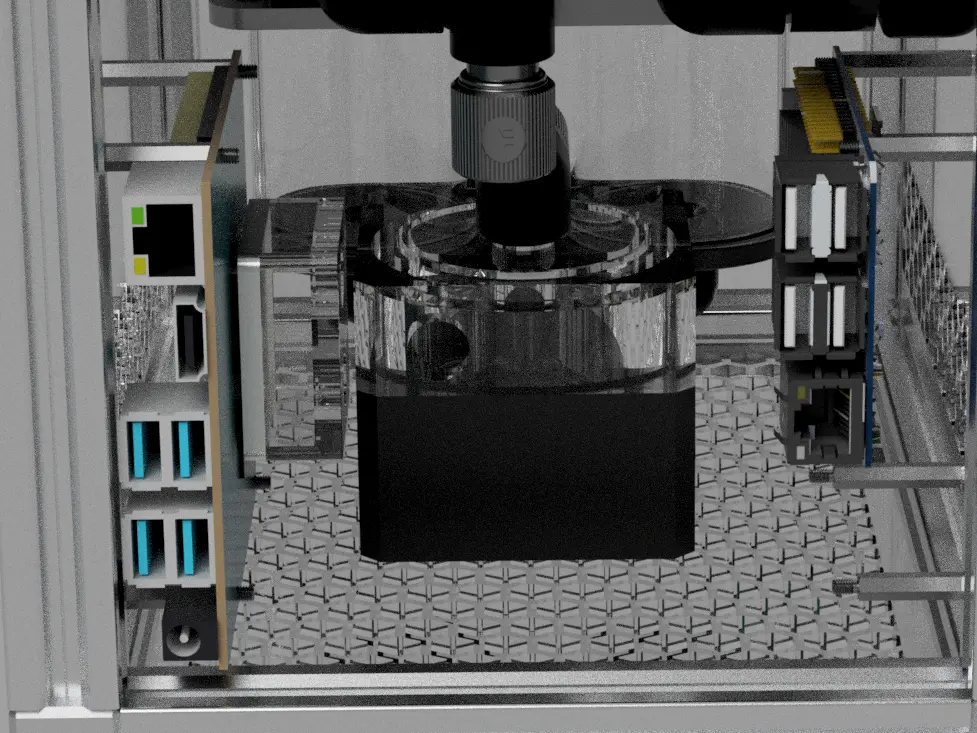
Pump Clearance
The above quick render shows the tight clearance between the approximate pump model and the approximate water block.
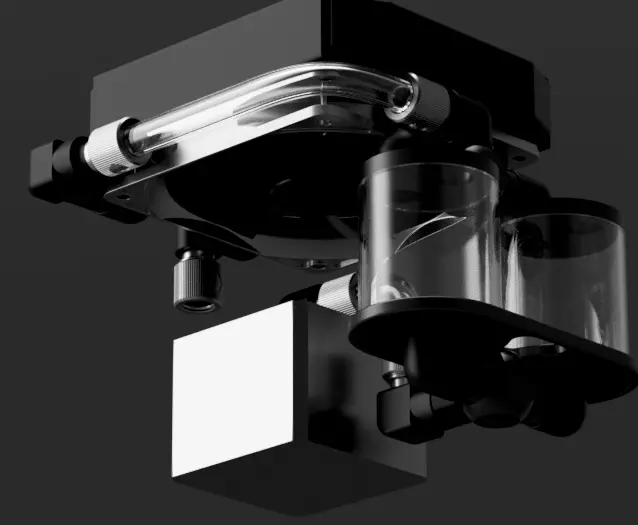
Version two
This is the final version of the assembly for now after all of the validation has been performed.
Iteration 3
The third iteration in the design follows around a week and a half later, once the delivery of the water cooling components arrived. At this point, the 2020 T-slot is still in shipping, so full assembly cannot begin.
During the initial unpacking of the water-cooling components, the components are measured, and the models in Fusion360 are updated to match. Updating the models causes Fusion to update all of the derived models, which eases the process.
However, using the extra fittings, its just possible to avoid the short tube link between the reservoir and the pump. Using additional fittings is not ideal as each joint is a potential leak location. However, dramatically easier installation and less tube justify this choice. The aesthetically pleasing black adapters are better in my mind.
Creating adapter for the water block
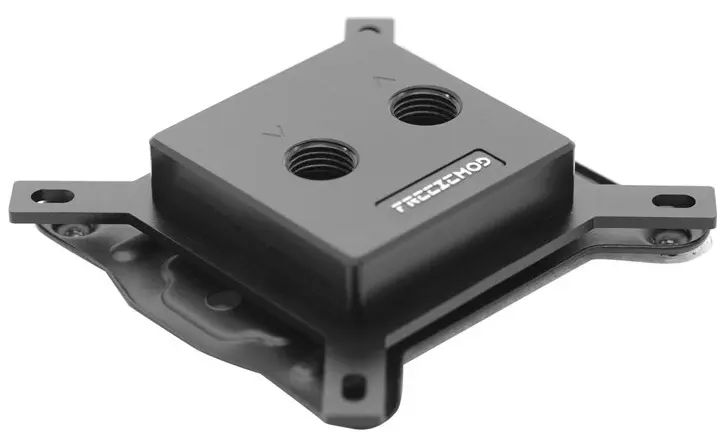
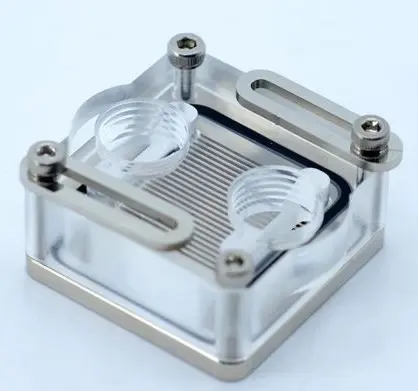
The Water Block
The water block from FREEZERMOD. This is designed for southbridge cooling of some motherboards.
Water Block Mount
With more accurate measurements of the water block, I designed a 3D printable adapter plate. 3D printing is not ideal as the print slowly deforms under pressure. However, as a testing adapter to allow for testing the system, this is perfectly acceptable. A thicker plate will be manufactured later on once all of the design is final.
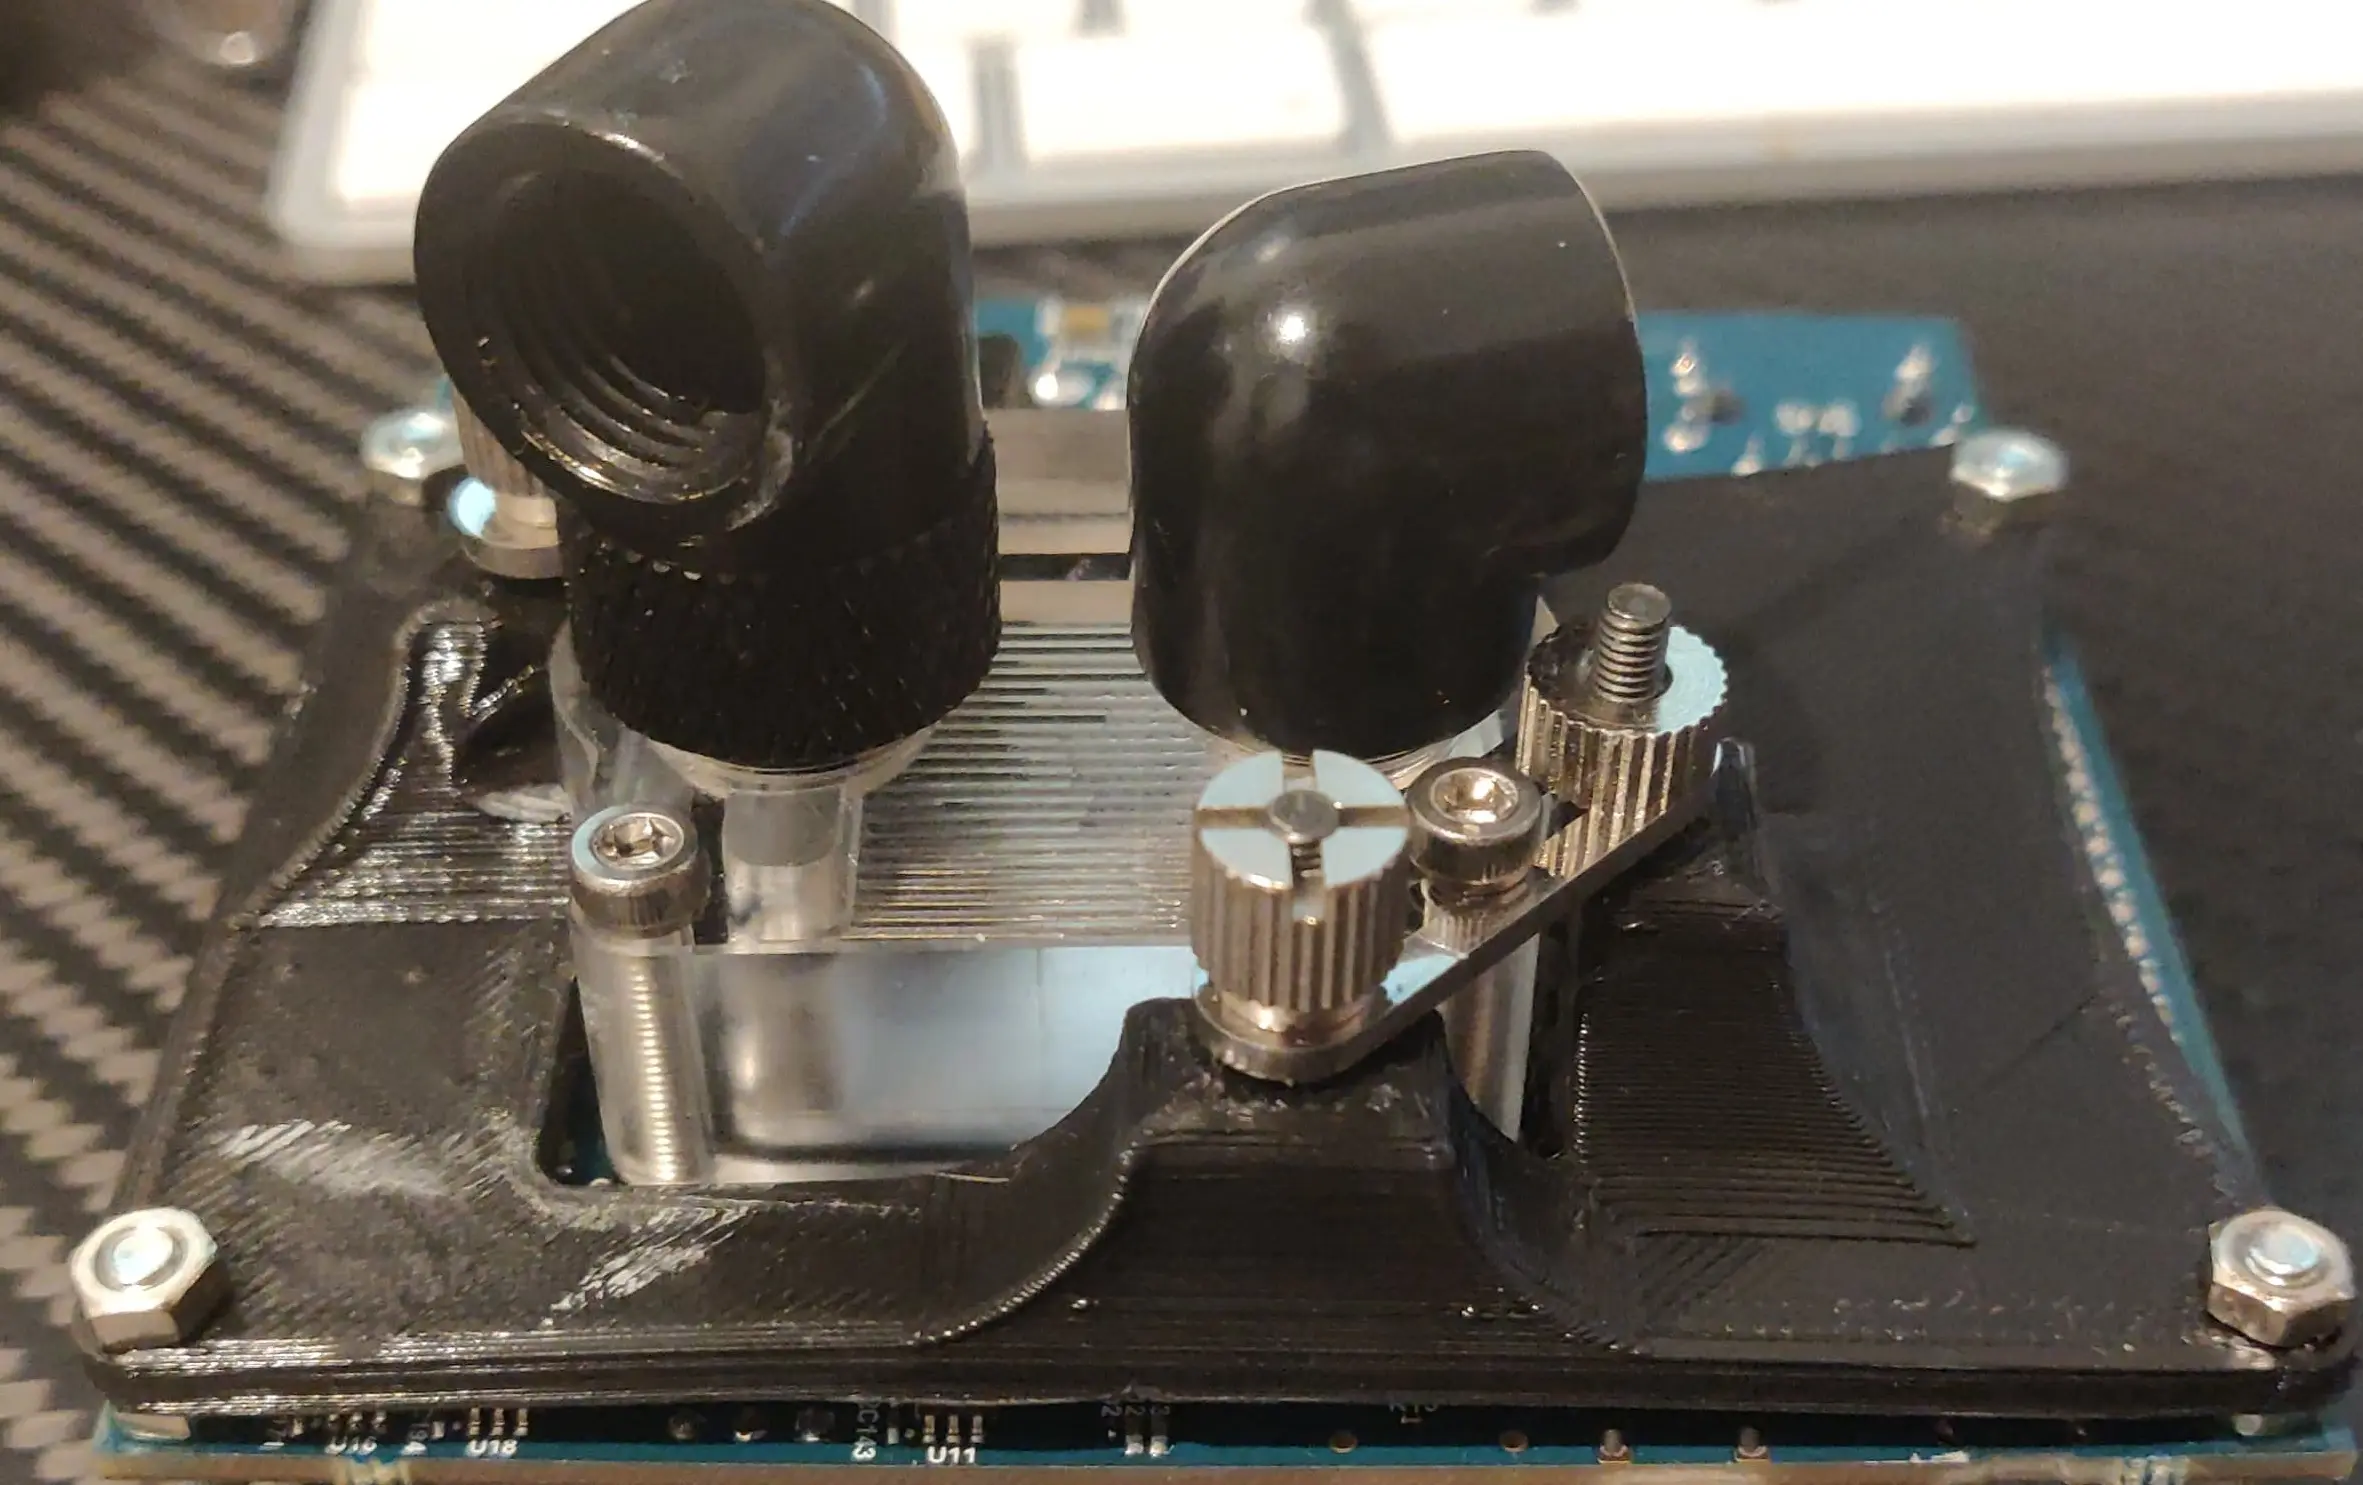
Water Block Mount
The water block mounting uses a mix of the provided mounting hardware along with generic M3 bolts that fitted the design. The water block is positioned to focus on contact with the CPU with half of the block overlapping the RAM.
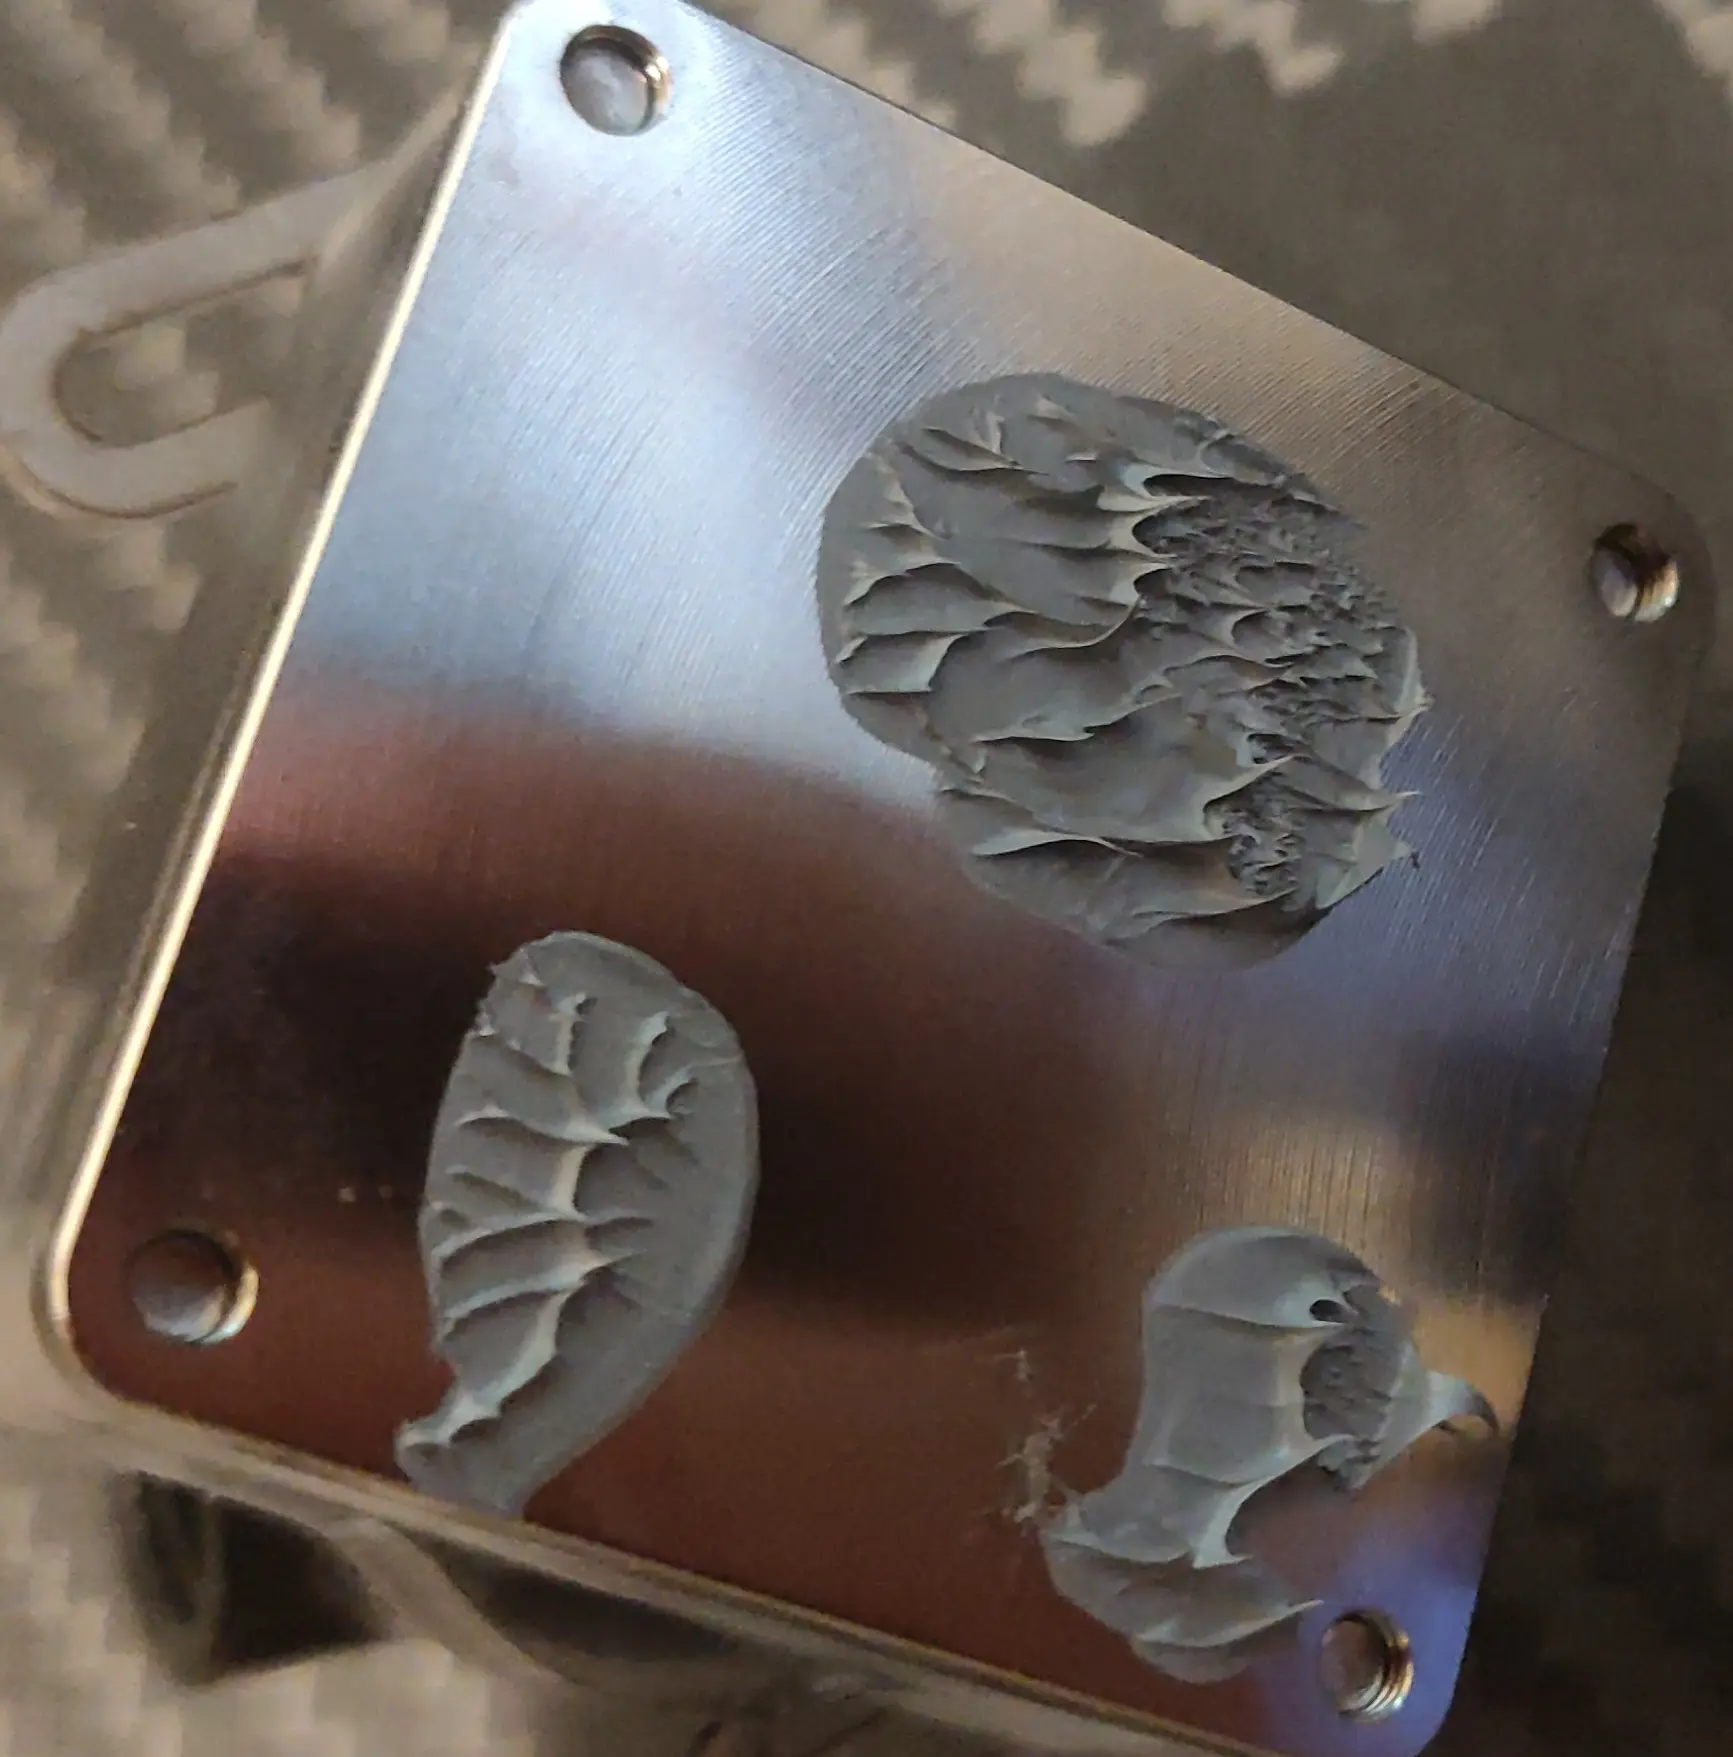
Contact area of the water block
Above shows the test after applying thermal paste to indicate where the CPU and the two RAM chips are touching the cold plate of the cooler.
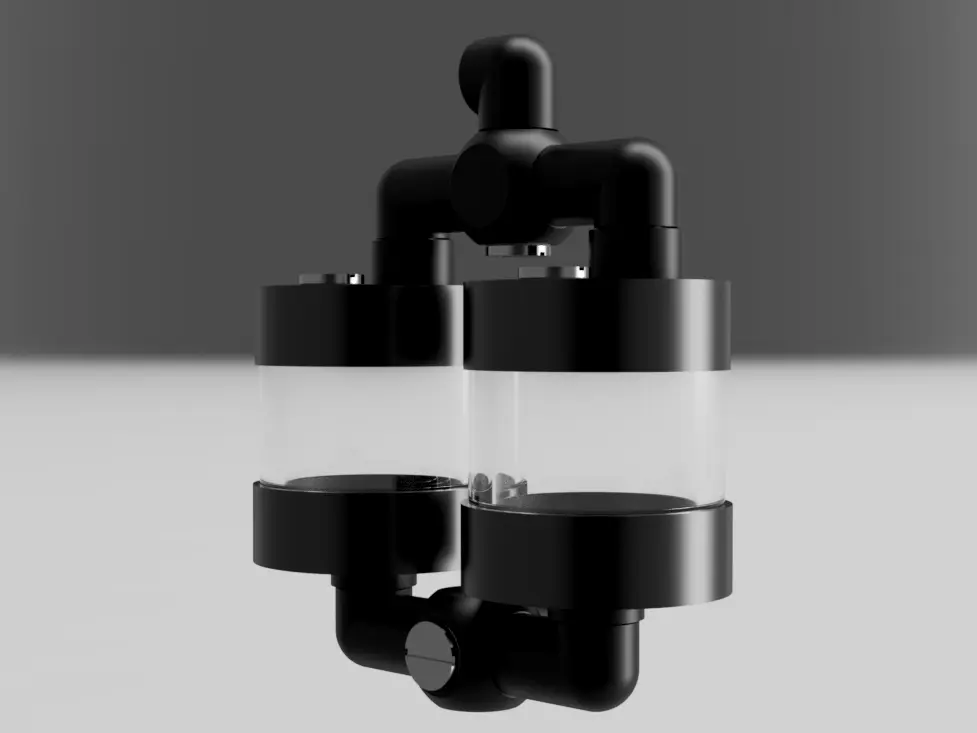
Assembly of the reservoirs and pump
Water Assembly
After deciding on the design of using fittings to couple the pump and reservoirs directly, the system is replicated into Fusion. Once the design is reproduced in Fusion, a quick holder for the parts was 3D modelled. This is not the final design. However, it allows testing the loop to confirm performance.
In the final design, this will be 3D printed again to interlock into the laser cutting to hold the tanks in place.
Performance
The part that we are all waiting for (well except for the finished results. But that’s part 2). For testing shown below, the pump is running at 9V. Approximately a medium speed and barely audible in an otherwise silent room. There is no fan fitted to the radiator, and it is mounted on temporary stands to keep it raised for convection cooling. The ultimate goal of this build is to allow the system to run with the fan only spinning up when required. In the final design, a slim low noise fan will be fitted to provide cooling when the water in the loop exceeds 40C.
| Cooling | Idle temp | Peak Temp |
|---|---|---|
| Stock Heatsink | +10 | +80 |
| H60 | +5 | +20 |
| Custom Loop | +4 | +10 |
So the H60 water cooler made a significant impact over the stock heatsink. However, the dedicated water cooling loop is cool. Running at basically ambient temperatures, the N2 has dropped from the hottest device in my setup to the coolest. Even running transcodes overnight; the highest CPU temperature was under 40C.
Part two of this build will follow once all of the remaining components have arrived (probably a month).