Where we left off
Part 1 covered the quick run down of selecting the STM32 and assigning a rough pinout in STMCube.
Part 2 provided a quick through the schematic capture process and pcb layout at a high level.
Part 3 here will cover the exporting the PCB for manufacture and a quick run through the ordering process with PCBWay.
Disclaimer
In this section I’m using PCBWay for the ordering process example. They have kindy offered to cover the cost of the production of these PCB’s before this series actually went live. They offered some free PCB’s around the time I was writing part two, making it very convient to use their services for this series of posts.
Creating the gerbers
KiCad calls generating the gerbers “Plotting”. When generating the files I reccomend using the option “Use protel file names” as everyone accepts these, where as not everyone will accept the newer ones. After you have generated the gerbers, use the generate drill files option to create a text file specifying all of the drill hits in the pcb. Make sure to select the option to merge Plated Through Hole (PTH) and Non Plated Through Hole (NPTH) as this is what most pcb houses expect.
Plotting gerber files

Plot (Generate) the gerbers
Create the drill file
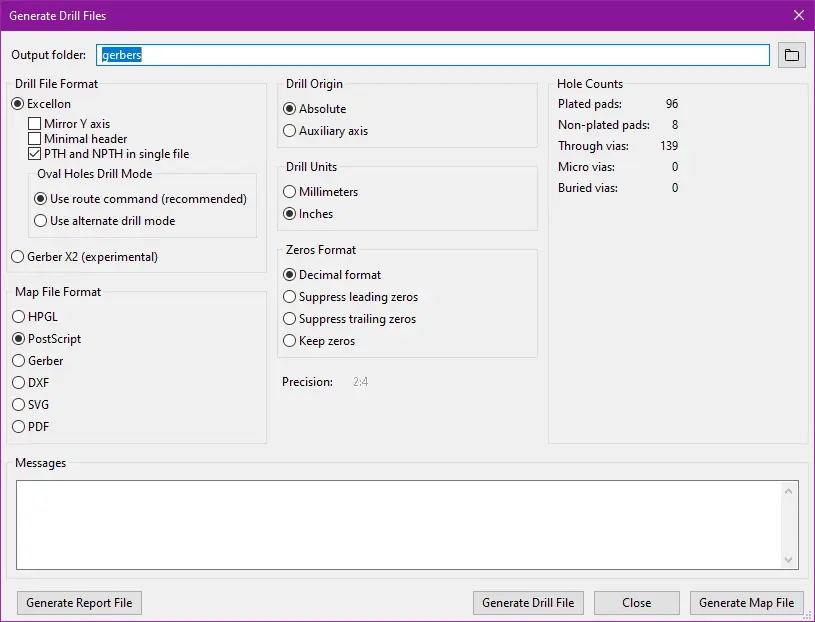
Generating the drill files
Creating pos files for PCB Assembly
In the PCB editor, File->Fabrication Outputs -> Pos file will allow creating a pos file. These are semi-standard files that have position co-ordinates on the pcb for the center of all of the components.
Generally most board houses will accept these as-is and it will just work. If in doubt look at the website for your manufacturing house to check if they have documentation as to how they want the files formatted. KiCad provides most of the options so this should be easy.
Create the pos files
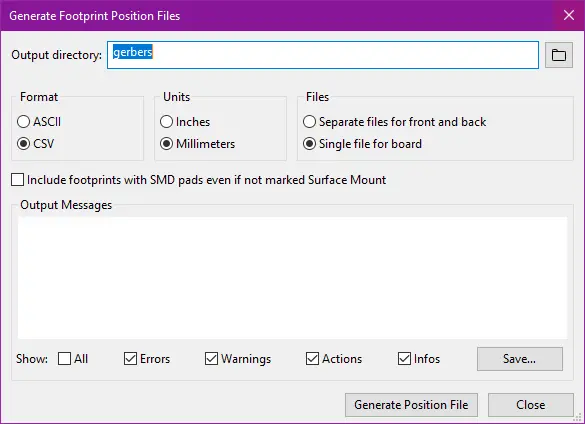
Generating the pos files
Uploading the gerbers to the website
For each board house the option is generally the same order of steps:
- Find the PCB service area of their website
- Create a
zipof your gerbers+drill file (and optionally pos) - Upload this
zipfile into the right location - Confirm the previews and details about your design (dont forget to check pcb thickness and layer count).
- Pay for your order and wait ~ a week
Setting up PCBA
If you would like for the manufacturing company to assemble your circuit boards (i.e. order and place the components), there is often a further step that will involve human interaction to check your bom and the pos file that you upload. The bom file is not a standard so each board house will have their own format that you have to conform to. Generally a sample file is provided to make it easier to create the right format in the first instance. When submitting for PCBA, expect to spent an extra day or two in delays to ensure everything is submitted correctly. The only exception to this is pcb.ng who have invested serious effort into allowing their website to handle all of this for you (making turn around times much faster).
PCB Manufacturers I have worked with
I have tried in the past to order PCB’s with different manfacturers, below is a short list of the various board houses I have uses and any comments on them. The pricing is the minimum order number, for the PCB’s (usually 3 or 5). Does not include shipping.
| Name | PCBA? | Min USD Price for 100x100mm | Notes |
|---|---|---|---|
| DirtyPCBs | N | 16.95 | Good option for large PCBs or odd colours |
| JLCPCB | Y | 02.00 | $4 after first board. Very fast + cheap. PCBA has LCSC library |
| OSHPark | N | 196.8 | Only good for small or After Dark |
| Elecrow | Y | 04.90 | Have reviewed before. Good quality |
| PCB.ng | Y | 39.90 | Fantastic quality. Good for small PCBA |
| Seeed Studio | Y | 04.90 | PCBA has a large parts library |
| PCBway | Y | 05.00 | Will custom order components for assembly |