My process for getting this neat little device running modern Linux.
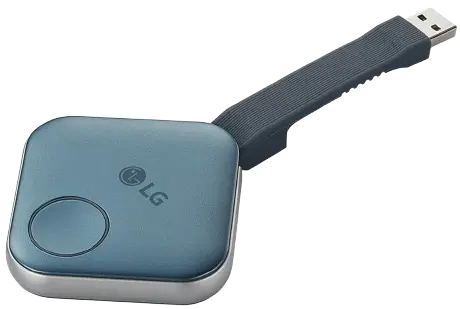
I first discovered the LG:One Quick Share in the discount section of MWave. It was discounted to just $4 and listed its hardware specs with “OS: Linux”. Since I was already placing a large order, I decided to grab one to explore what was inside.
When connected to my laptop, the device appears as a USB storage device and exposes a Windows installer for its software.
Since I don’t own any Windows machines, I can’t comment on what this software actually does.

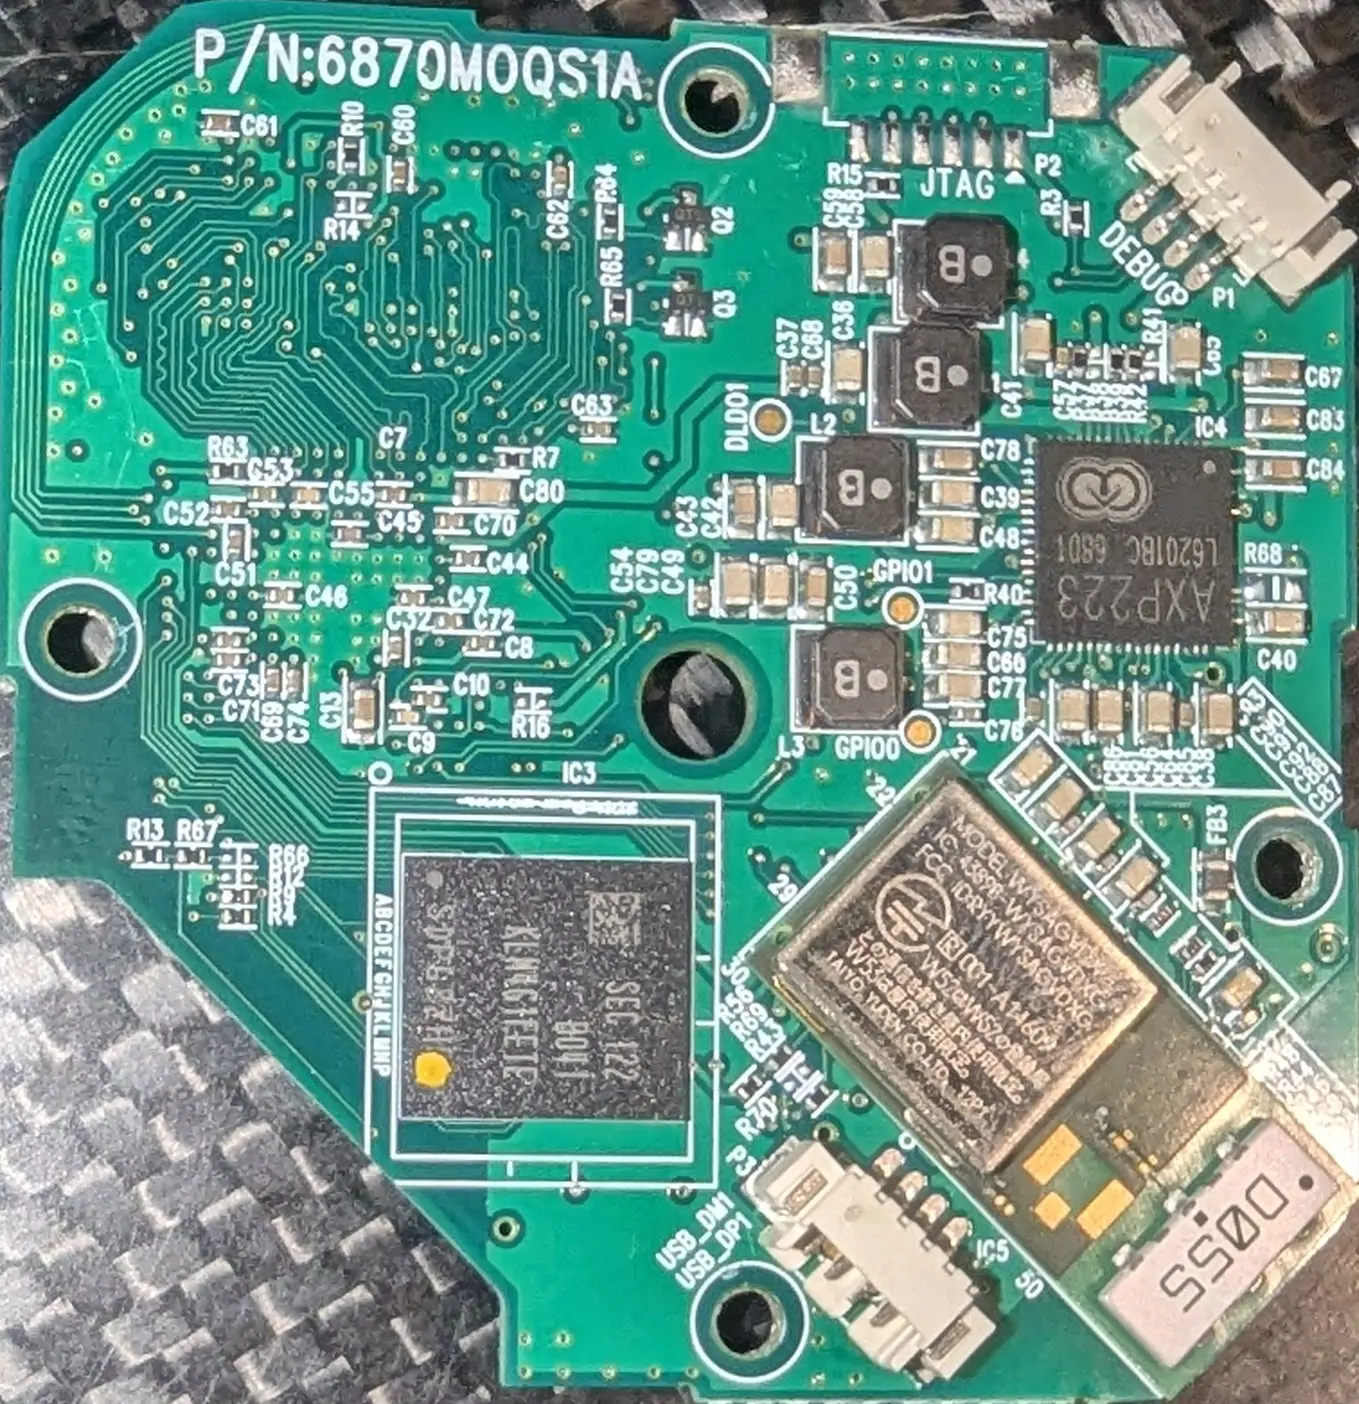
Upon opening the device, it was clearly well-designed and worth exploring further. It featured a convenient UART debug connector and an internal USB port header.
The hardware matched the website description: 4GiB of eMMC storage, 512MiB of DDR RAM, and a quad-core 32-bit ARM processor.
The clearly labeled DEBUG connector provides access to the UART serial console. Upon powering on, we’re greeted with an unlocked U-Boot Hush console with all the useful commands still available.
Booting to Linux reveals a dated but functional kernel that uses device tree for configuration - which should help when porting to a newer kernel.
Dumping the filesystem
Breaking into the U-Boot console, the ums command is available, which allows a quick ums mmc 0 to expose the internal eMMC as mass storage.
After a slow dd to dump the filesystem, we’re ready to have some fun with this device.
Root Password
sigh
It’s 123. This didn’t require much effort to discover.
Since logging into the running Linux system took less than 5 minutes, a quick ps aux revealed interesting applications running from the /local/etc folder.
Examining these files showed various scripts and binaries on disk. I didn’t spend much time exploring here, only noting the default WiFi network it attempts to join.
FEL
To enter the FEL ROM-based bootloader, there might be a GPIO method, but the simpler approach was to force the eMMC initialization to fail.
Carefully probing the board with metal tweezers (hey, it was only $4 and more were in stock), I discovered that shorting across R67 would prevent the eMMC from initializing, causing the device to enter FEL mode.
This allows us to RAM-boot U-Boot for safe experimentation before modifying the eMMC.
I eventually mod-wired a button to perform this short, allowing me to easily force FEL mode (which I ended up using far more often than I’d care to admit). Now that the work is complete, hopefully you won’t need this modification.
Buildroot setup
At this point, setting up a Buildroot environment in a Podman container is essential in my workflow. I prefer using containers to make the process reproducible for others following these steps, and it isolates my personal Linux setup choices from affecting the build.
Checking out the latest Buildroot release and loading the defconfig for the closest matching board provided a good starting point, since the AXP223 regulator was likely wired similarly.
Dumping dts
With the root filesystem from the original image, we can examine the DTB file in /boot.
After decompiling this and spending an hour fixing up p-handles, we have a scaffold to guide our work. Unfortunately, since this was for a much older kernel, not everything will drop into place cleanly.
However, we can copy over much of the content.
Creating our own minimal device tree source (DTS), I copied over the voltage regulator settings and configured the r_uart similar to the template DTS.
Bringing up u-boot
Running the Buildroot make O=/app/output uboot command produces an SPL-enhanced U-Boot ready for booting.
With the board in FEL mode, the sunxi-tools provide the ability to RAM boot the U-Boot image.
I lost a few days here because I initially started with an A33 template that simply wouldn’t boot in FEL. After some trial and error with the build, the UART finally output the U-Boot banner and started up.
With this working, U-Boot would boot far enough to detect our eMMC (now at mmc1) and provide the interactive Hush prompt.
One important note: the newer pre-boot SPL loader is required for the SPL to work with newer U-Boot when programmed to eMMC. While debugging USB issues, I erased the eMMC and flashed a semi-working U-Boot there to rule out FEL as the cause (spoiler: FEL was never the problem).
USB
Unfortunately, OTG USB eluded me for several days - it simply would not probe.
The “fix” was to start over once I discovered the sun8i-r16-parrot config, which was much closer to my actual hardware. This configuration just booted and worked for USB. While frustrating, it was also glorious.
Working backwards through the changes, the key appears to be that CONFIG_USB_MUSB_GADGET=y and CONFIG_DMA=y are required.
With USB working, getting Linux running became the next priority.
Linux
Thankfully, after updating the kernel setup in Buildroot to use the device tree, the kernel booted on the first try. Again, I relied on the existing configurations for the r16-parrot.
From here, setting up the OTG port to provide networking for SSH access plus an SSH server was relatively straightforward.
Final state
The final result is a fully* working Linux and U-Boot setup that allows repurposing these devices for development work. The only catch is that I haven’t managed to get the ADC-based button working yet.
The complete Buildroot setup is published on my GitHub. Feel free to fork it, open PRs, or go wild with it.